Cassava Pasta {Paleo}
Prep time
Cook time
Total time
Author: Sue at www.backcountrypaleo.com
Serves: 4 servings
Ingredients
- 1 cup cassava flour
- 2 large eggs, plus 1 yolk
- ¼ tsp salt, plus a pinch for the cooking water
- 2-3 tbs olive oil
- NOTE: Depending on the brand of flour you use, you may need to either add more flour, or add a bit more olive oil (or the white from that third egg). Your dough should come out flexible but not sticky.
Instructions
- Making the pasta
- Pour the flour out on the countertop or a large cutting board. (I like to use a flexible plastic cutting board; it makes the whole process easier – explained below)
- With your fingers, create a crater in the center of the flour, large enough to hold the eggs and olive oil – make sure it’s big enough for all that liquid!
- Put the eggs, egg yolk, olive oil and salt into the crater.
- Using a fork, gently whisk the eggs, mixing in a bit of flour with each movement. Be wary of the eggs making a break for it over the flour wall!
- As the flour becomes incorporated enough that the eggs won’t flash mob on the countertop, start to use your hands to mix the dough, kneading it into a compact ball. It should end up plastic but dry enough to roll into a ball that doesn’t stick to anything. No need to knead it as long as a wheat-based dough; there is no gluten to work with.
- Roll the dough into a ball, then into a cylinder.
- Cut the cylinder in half and place one piece to the side.
- Flour the cutting board (you can use your countertop if it won’t be damaged by the knife you use to cut the pasta strips, but I prefer a flexible plastic cutting board – it makes it easier to handle the pasta later).
- Press the cylinder into a flat rectangle.
- Roll out the dough as thin as you can – you want the shorter edge to be about as long as you want your pasta strips. Go really thin – the pasta thickens up a bit when you cook it, and if you make it too thick, it will take longer in camp to cook through.
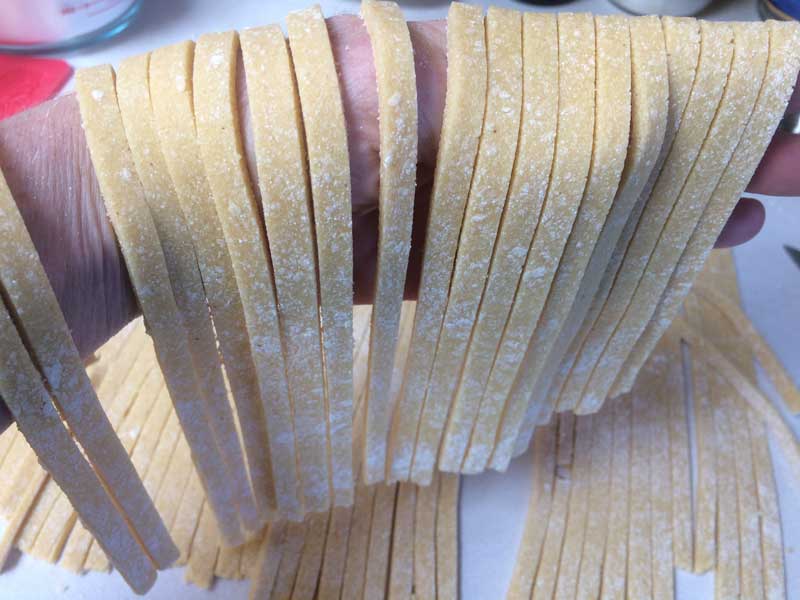
- Using a thin plastic cutting board or something else as a guide, cut the pasta strips with a thin knife, making sure each piece separates from the one next to it. Don’t press much on the cutting board you are using as a guide; if you do, the dough will be harder to remove from the surface below.
- The pasta should be easy to remove or slide off the cutting board; move it to another surface so you can repeat with the other half of the dough.
- OR: I like to use three soft plastic cutting boards for this (they commonly come in a set of three or set of four) – one for each half of the dough and one on the top to guide the knife. This way, I can just slide the noodles off each cutting board into the boiling water, and voila, we’re cooking!
- Bring a large pot of water to a boil. Throw in a pinch of salt.
- Carefully drop the pasta off the cutting boards into the water (don't splash!), and boil for 2 to 3 minutes depending on the thickness (test at 2 minutes). If you opted to roll it out on the countertop, if you floured the surface, you should be able to pick it up easily with the back of a long knife. Just slide the knife under, and make sure to use the flat back of the knife to lift the pasta.
- While the pasta cooks, lay out the dehydrator trays so you can load them up quickly.
- Drain the pasta in a strainer or colander. You can rinse with cold water if you like, but it’s not necessary. If you are eating the pasta fresh at home, you might want to not rinse - it remains starchier and sauces stick to it better.
- Immediately after draining, once the pasta has cooled enough to touch, lay the pieces out on the dehydrator trays, leaving space between so they dry evenly. Do not let the pieces be touching each other. If you wait to lay the pieces out, they will begin to take the shape they have while laying in a tangled mess in the colander, and this makes it hard to lay them out on the trays. They will still dry this way, but it uses more room on the dryer trays, and more importantly, when you pack them up for the trail they will tend to poke through the plastic bag more than a handful of straight pasta pieces.
- Dehydration
- Dehydrate at 135°F for 5 to 6 hours depending on humidity, and thickness of pasta. Test a piece to make sure it’s dry all the way through. If in doubt, dry for more time.
- Take the trays out and let the pasta cool completely.
- Oven instructions
- It’s easy to dry pasta in the oven. I prefer to do this only when I will be home the whole time. With my old oven and the short drying time, I didn't find it necessary to vent. If your pasta seems to be taking a lot of time to dry, you may need to prop the door open to vent moisture.
- Preheat the oven to 150° to 175°F.
- Lay the pasta out on parchment paper-covered cookie sheets.
- Dry for 3 to 4 hours, testing for dryness.
- Storage
- Package in an airtight container. Make sure to label it with date and ingredients.
Recipe by Backcountry Paleo at https://www.backcountrypaleo.com/cassava-pasta-paleo/